Labels

Thursday, June 30, 2011

I want to go to the bathroom BY MYSELF!

If you are a mom, you have probably thought this.  I am thinking it today.  I would like for the most private activity to be, oh, I don't know, PRIVATE!

I have brought this upon myself.  When Ella was potty training, I would take her into the bathroom with me all the time so that she got used to the idea.  Now, if I make the kids leave, one cries the whole time, and the other yells questions at me through the door.  Not exactly a relaxing environment.


I have written a little poem in order to air my frustration.

Potty Mouth
by Beth Lewis

I'd like to go potty alone.
And sit on my porcelain throne.
Yet when I get the need,
my kids, with great speed,
come into my privacy zone.
 
 
When nature calls me to the loo
My children take that as a cue
to follow me in.
It gets under my skin!
I'm not really sure what to do.
 
 
When I have to go to the john
why must a party go on?
I would like to be
Alone - just me!
Without either one of my spawn.

Wednesday, June 29, 2011

Playing in the pool

We were in Tennessee the last two weeks, visiting my family.  I tried to keep up with the blog initially, but it just wasn't as important as hanging out with my parents.  I know that each and every one of you were devastated.  I heard you crying from below the Mason Dixon.

I had visions of having this great post with pictures of the kids playing in the amazing water fountains in Chattanooga.  In my head, there would be glorious moments, squeals of delight, and perfect weather.

That didn't happen.  The weather never cooperated, and there were lots of thunderstorms.  Our power even went out for an evening {that sure could have been worse}.  We took the short opportunities with good weather to play in the kiddie pool on the deck.  They were in before the water was!


My mom still had Little Mermaid swim diapers left over from when Ella was Jack's age.  I think he looks good in pink.


My beautiful Ella.  I love this picture.


We played with lots of kitchen utensils and colandars, pitchers, and cups.


We did a little sunbathing.


We played peek-a-boo.

I soooooo love this picture!


And we played with G.G.


I would have loved to have some pictures of them playing in the fountains, but they didn't feel any disappointment at all.  They got to play in the water, love on their G.G., and their worlds were perfect.  Hmmm.  Good lesson.


Tuesday, June 28, 2011

Just a year ago

A year ago, our little boy was so sick.  He was literally starving himself to death. 


We found a wonderful pediatrician who had him admitted to the hospital.  My mom was in town and able to stay with Ella.  Before we left for the hospital we took these pictures because we weren't sure what the future held and we wanted to make sure we had up to the minute pics.


Handsome Hero was out of town when we were admitted, and had to fly in to stay at the hospital. 

Jack weighed between ten and twelve pounds at seven and a half months old.  He had weighed nearly nine at birth.  His face made him look much older because he had no fat pockets.  I always said he looked like my granddad, but....


He had a feeding tube put in.  That was not fun for anybody.  You know the saying "it hurts me more than it hurts you?"  Yeah.


With the extra nutrition, he started to feel better.  Here he has the energy to sit upright, supported by Handsome Hero. For awhile, a day consisted of nursing, feeding him through the tube, pumping for the next feeding, nursing, feeding him through the tube, pumping for the next feeding, nursing, feeding him....  You get the idea.


This little guy had no energy before.  He would just lay like this.  In the early months, we just thought he was cuddly, but by this time we realized he didn't have the energy to lift his head.


But once he started getting needed nutrition, he began to blossom.  His eyes got brighter.


He became happy.


I still cry when I see the picture above, because we hadn't seen him smile in such a long time, and suddenly it became normal to see him smile.  It became normal for him to hold his head up.

We didn't know why God allowed Jack to go through this.  We don't know why it all came to a head when we were living out of boxes, so new to this place we hadn't met anyone.  We had just left our church, where we had an unprecedented support system.  Here, we had no local support system.  But because of that, we relied totally on the Lord.  We learned to find joy in this trial, because the testing of our faith produced a little more endurance.

A year later, this is my Jack.  Handsome Hero says that while Ella is training to be a soccer star, Jack is training to be the soccer ball.


I'm very proud of this belly!


I can't get enough of those adorable, fat legs!


And these cheeks!


Our Wonderkid loves to eat.  We are so thankful.


We know the Lord did not have to heal Jack.  But He did, and we are so grateful.  We still do not know why he was starving, but we have peace that the One who created Jack knows.

The End

Monday, June 27, 2011

Another lamppost

I don't know why I think that's funny, but I just kill me! Another lamppost!  Get it?  Oh, you do?  It isn't funny?  Oh.

I worked on not one, not two, but THREE lamps recently! Here are the other two.

First we have a floor lamp that I found on the side of the road last summer while taking a walk with the kids.  We must have looked pretty funny - Jack was on one side of the stroller and a floor lamp was in the other seat instead of Ella.  I love her, but seriously, a free floor lamp?  I had to choose, and the lamp can't walk.


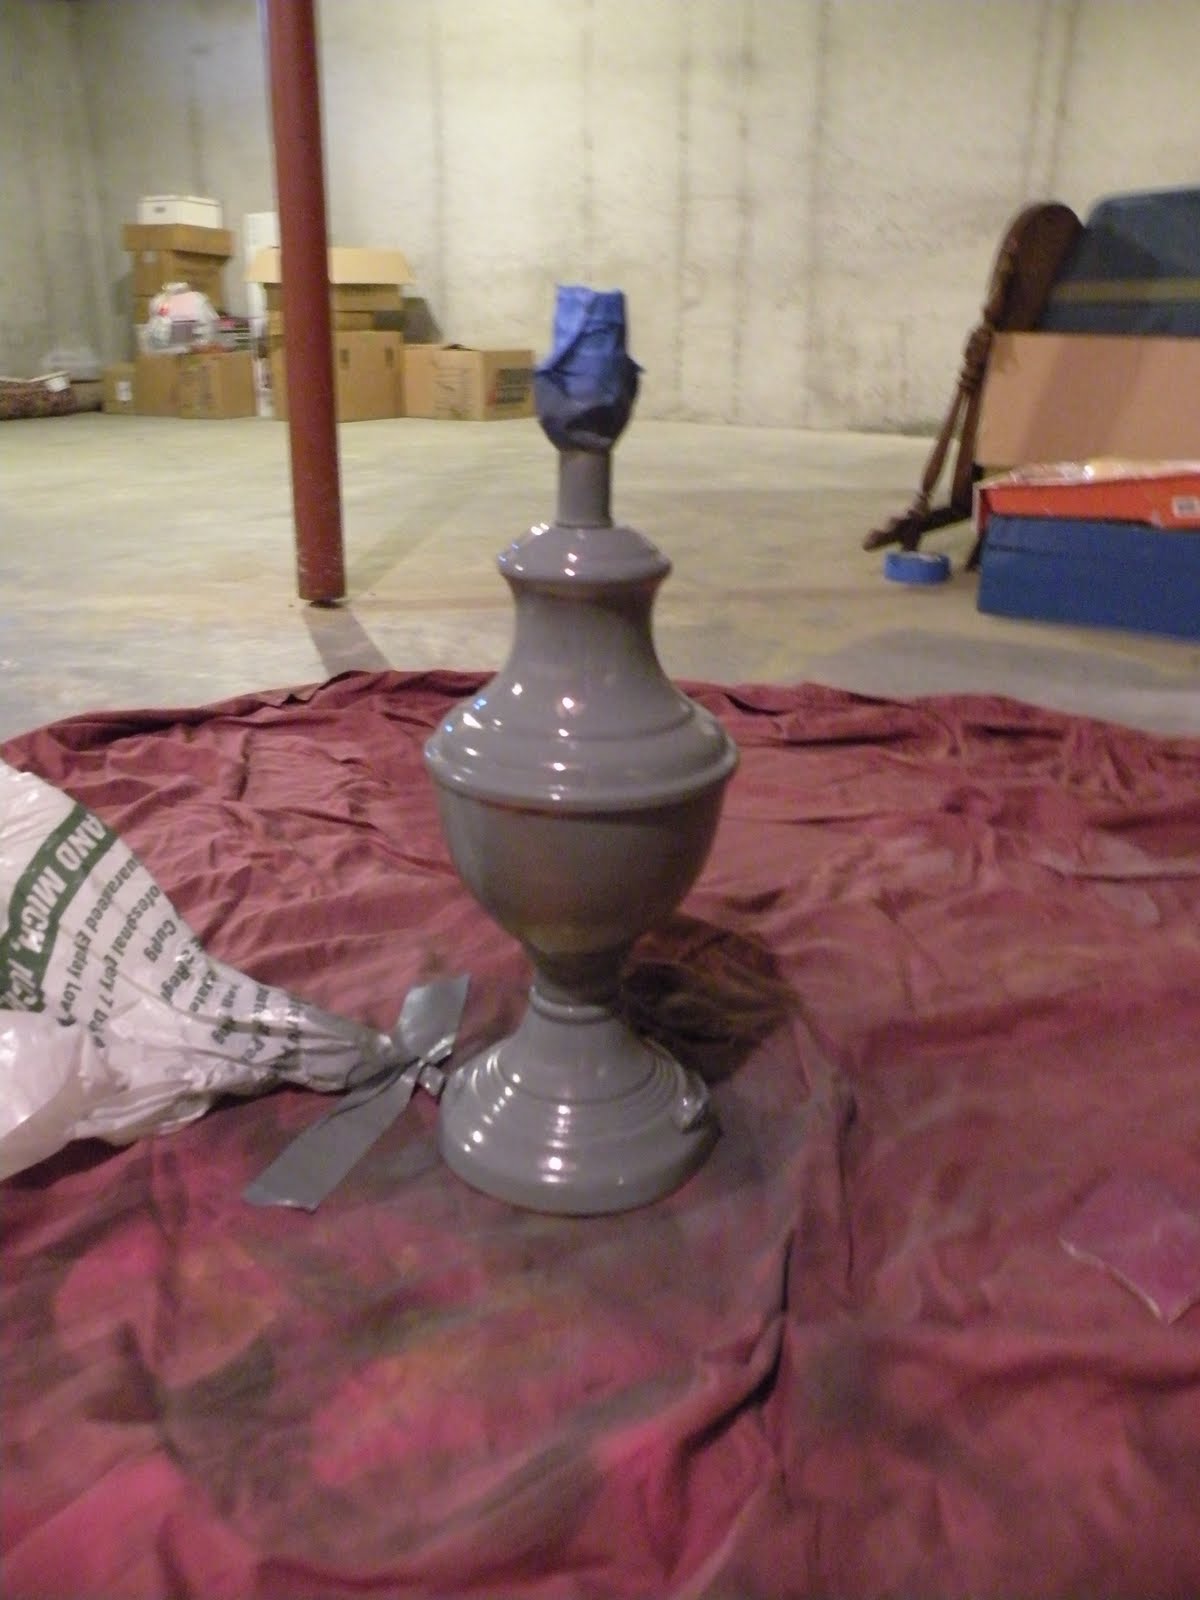
It was originally white, and I thought I wanted it black, so I got a can of spray paint and went to town.  Now, spray paint is oil based, as are factory painted pieces of furniture, so I thought I would have no problem.  I didn't realize that a baked on, shiny factory finish would need to be sanded to a dull surface in order to hold the new paint.  It dripped everywhere, so I did the mature thing and got mad at it and left it in the garage the whole winter until this week.  Talk about a time out!

This week, I went to Sherwin Williams and asked them what I should do.  They suggested sanding the black paint down until smooth, priming, and painting again.  And that's what I did.  I realize the color is a little crazy in the room right now, but I'm adding in more of that color in other places and if it ends up looking out of place when I'm done, I'll just paint it black like I had originally intended to do.  It's about to get crazier before it makes sense, though.  Get ready.

This is my shade fabric.  I. love. it! 


It compliments the other fabric that will soon be on a bench in the room.  See the blue in the fabric on the right?  It's the same as the lamp base.  Is it making a little more sense?


I actually liked the shimmery silver of the shade, but had to cover it because of the imperfections in it.  It was another Homegoods clearance item.  Did you know you can barter at Homegoods and their sister stores, TJ Maxx and Marshalls {and many other stores, for that matter}?  If you find something not on clearance but with defects, you can ask for a discount.  There has only been one time that hasn't worked for me.  And I walked away from the purchase because of it.  And then I asked Handsome Hero to go back and get it for me for my birthday.  I have no will power {sigh}.

I used the same technique that I used on the last lamp, except that I didn't trim it beforehand because the shade was cone shaped and I make too many mistakes to trust that I would cut it correctly.


Once it was covered, I trimmed it and glued it down.  The pictures below show how I snipped excess on the top so that it folded over easily.


Then I covered the inside raw edge with ribbon.


Now that was a mistake.  See how you can see through to the inside on the picture below?  I need to fix that.  You can't see through like that on the table lamp or the kitchen pendant that I finished in the same way, so I'm a bit surprised.  I think I will use a utility knife and take off  the extra on the inside.  Yuck.  Not a fun job.

Anyway, I thought it needed another little something,


So I added some gray trim.


Now, here's where you can see my second mistake.  I should have ironed the fabric before putting it on the shade.  I thought it would just disappear, but it didn't.  I'm not sure what to do about it, but you can't really see it when it's on the lamp base.

Looking at the finished product, I think the base color is too bright, but I'll wait to change it until the other elements in the room are complete. 


It's funny:  I love all the parts of this lamp in theory.  The base is one of my absolute favorite colors,  and the fabric is one I have had my eye on and was thrilled to get to use.  Both should theoretically have worked in the space.  Not sure that they do....  The lamp kind of looks like it belongs in a teen girl's room.  Still, I'm all about eclectic, so I'll wait to do anything about it until I've upholstered the bench, changed the pillows, etc. 

Now for the other lamp.  The one in the picture below was from Goodwill.  I put a plain white lampshade on it, but it was boring, so I added some pleated ribbon to the shade.  Sorry the pic is so dark. 

Here's the close up of the shade.


And {drumshade roll, please}, here they are together. 


Still not sure about that floor lamp.... 

It's going to give me hives thinking about it.


Tuesday, June 21, 2011

YOU...LIGHT UP MY LIFE...

We needed a new lamp for the living room, but I'm cheap and didn't want to pay for one.  I had seen tons of lamp redos online, and I figured that made me an expert. 

So I took the kids and went thrifting.  This little gem had a pretty shape and was only $2.00!  Now, it isn't a nice, heavy brass lamp.  I would have issues scratching up and painting a nice lamp, no matter how cheaply I got it. 


For those of you who have a lamp hanging around that needs some TLC to bring it back to life, here's how I did it, with some tips from the "learn from my mistakes" realm.

I covered the important areas of the lamp with tape, and sanded the surface with a high grit sandpaper.  Paint doesn't adhere well to shiny surfaces, so this is really important.


I used a gray spray primer {because I had it}.  Priming also helps the paint to stick.


Meanwhile, I searched for a shade at a thrift store that I could recover, but they were all either the wrong shape/size or were sold with a lamp.  I found this one at Homegoods on clearance for $5.00 because the ribbon was coming off and the seam was unglued.  This wasn't a big deal since I was going to cover it anyway.


I took off the trim and reglued the seam. I chose a pretty navy blue for my lamp base and sprayed three even coats.  This is what I ended up with.


Pretty, but still a bit boring.  I had a fabric remnant that I had planned on making into a pillow, but decided to recover the shade with it instead.  I draped it over to see if it worked in the room.  Check.


Then I measured {read: eyeballed} and cut the fabric with about an inch overhang on all sides.  Because this is a true drum shade {the top and bottom are the same circumference} it was an easy job.


I used Elmer's spray adhesive for this project.  A friend at Hobby Lobby actually took all the spray adhesives into the back and tested them for me.  This one came out on top in her estimation, for what it's worth.  It's the same adhesive I used for the pendant in our kitchen and we haven't had any problems.


I recommend two people for this next part.  Handsome Hero sprayed the adhesive onto the shade {we've found that works better than spraying the fabric} and I smoothed the fabric over it.  No, Mom, I would never be doing a dirty project in the pajama pants you gave me for Christmas.  And, yes, for those who care, I do still have my D.A.R.E. shirt from when I taught in Delaware thirteen years ago.  Is there a problem here?


Anywho, we lined up the fabric with the shade seam and followed around, working in small sections.  That is important because if you want a permanent stick you have to attach the fabric within fifteen seconds.  When we got to the end, we sprayed a little on the end of the fabric and I folded it over to make a seam.


That's the seam on the top, if you can tell.  What?  You can't?  That's because we're professionals.  Well, maybe it's because my picture is a bit blurry.


I used a glue gun to paste the the fabric lip to the inside of the shade.

I snipped the fabric to go around the wires.


And then it was done!  This corner of the room needed something.


It still needs more, but this is a good start. 


Purty!