In fact {ahem, *cough*} that is why I strive for the extremely high standard of excellence that you will see today. Really high. Like to the sky and back twelve times.
Get ready to applaud. Ready? I MADE A CLOTHING ITEM! I sewed it. With my own two hands. And my sewing machine.
I even did stuff you're supposed to do that I try to avoid doing, like iron my seams. This is Crazyland, people!
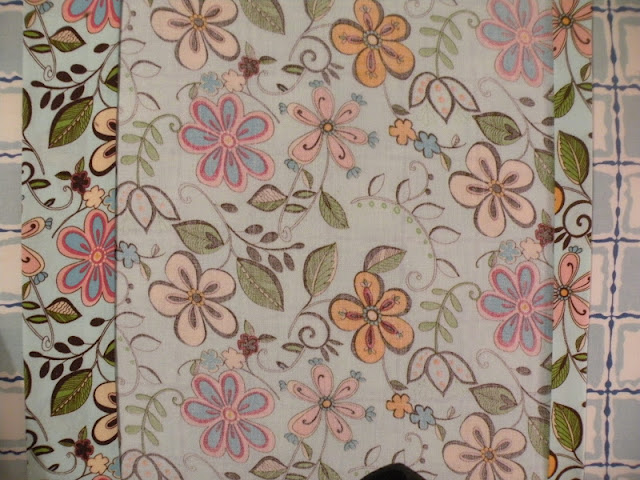
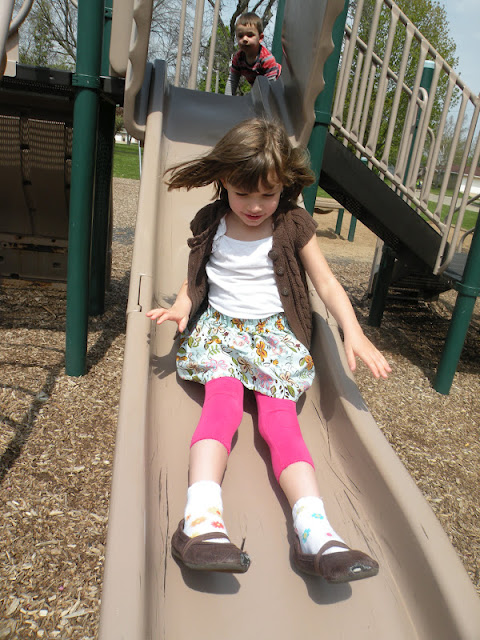
Why was I sewing a skirt when I have so much to do to get ready for the baby? Well, when I was going through my stash of fabrics to see if anything would work in the new room, I came across this leftover material from another project. I have had this idea festering in my mind of how to make an easy skirt for Ella. You see, she LOVES skirts and dresses right now, but most of her dresses are too nice to just play in. If this worked, it would be perfect for play, and would be a great basic shape from which to make some pretty fun decorative changes.
Well, it worked!
Please excuse the expression. We couldn't coordinate the smiles with the camera clicks....
I'm going to tell you how I did it, and what I will do differently next time. Be prepared, if you are one of those pattern-followers. You will hate this. I only did one real measurement.
The Ella Skirt
Total time: around one hour
Materials:
Fabric {measure from waist to however long you want it - I did the knee - and add a few inches for the hem and waistband}.
Matching thread
Scissors
Sewing Machine
Elastic {I used a wide waistband elastic}
Needle
Iron and ironing board
Wash your fabric and iron it. Measure your elastic to the waist and take off one inch.
I used the full width of the fabric {probably forty-five inches - that's standard} since it was gathered.
Make a casing for your waistband by folding over once {about 1/2 inch}, ironing, and then folding over again about 1/2 inch bigger than your elastic. This gives you room for your seam allowance.
Now, typically, you wouldn't do the hem until you had finished the skirt and tried it on your
I went ahead and sewed them first. It was easy to do it this way because it was a flat piece at this point, but I think next time I will sew the back seam down first, and then do these. This skirt is really forgiving, so it doesn't look bad, but I think it would make it lie flatter.
To put the elastic into the waistband, stick a safety pin through it and weave it through.
Handstitch the elastic ends together. I folded the rough edges of the waistband fabric over themselves and stitched through them and the elastic again with the sewing machine. After that I did the back seam. Again, next time, I'll go ahead and do the back seam first. Because of the way I did it, there is a little pucker right under the waistband. No one will notice it, but it wouldn't be there if I had sewed the back seam first.
Instant gratification!
The best part is that she loves it! She wore it as soon as it was done, and is wearing it again today.
Jack saw Ella carry a purse outside, and ran to get his matchbox car bag. It was really funny, especially since Ella decided to go without.
It makes my heart happy.
I think that making this in black with a wide white band at the bottom would be ADORABLE! Or embroidering with some beads or one of the many transfer designs they have at the craft stores. Or stenciling a solid fabric in a cool design. You could even do a monogram! Or you could get a ruffled ombre effect by making layers in gradually lighter colors. Oh, the possibilities!
I have LOTS of ideas of how to make this basic skirt really fun, but I suppose that first I should concentrate on the many projects I have for the new room and the new baby {like the pile of burp cloth fabrics that I have neglected}.
For now, I'll just be proud that I have dipped my little toe into a new pool. Before you know it, I'll be using a pattern. Or measuring. Or sewing in a curved line. Neh. That's expecting too much.


Hey! Was I one of the eight??? I read it, most of the time:) I love seen your kid's growing up and all of the creative things you are up to!
ReplyDeleteMy nails are now to long to type properly. Yeah for vitamins. Above comment contains horrible typo. "Seeing".
ReplyDeletejfkd;asfjdka;l
jdk;as