After adding the panel, they looked like this:
Much better. However, the tie-backs are really boring, utilitarian cords from a fabric store. I've always planned on updating them, and finally took the plunge. Here's the how-to.
Materials:
Light weight fabric
Stiffy fabric stiffener {I know. Could they have come up with a worse name??}
Iron
Ribbon
Curling iron {optional but helpful}
Craft paint {optional}
Embellishments {optional}

Directions:
Cut your fabric into gradually smaller squares.
Pour some fabric stiffener into a container. Put pieces one at a time into the stiffener.
Squeeze out excess.
Lay them flat on a piece of wax paper or parchment paper.
Leave them overnight, and voila! They will be stiff like paper.
See? Now they will be lumpy at first, but a swipe with an iron will take care of that.
Find a flower shape you like {I used clip art} and use the computer to make it bigger and smaller. Get cutting!
Lay them out concentrically.
Use your curling iron to curl your petals. I had been planning on curling them the other direction, but this worked better for tie-backs.
Use your finger to hold the curl in place while it cools. You could just use an iron and mold it with your fingers, but it won't be as easy.
Once it cools, it will keep its shape. This project is forgiving. If you mess up, you can always recurl. This picture below is actually my first try, and I recurled it to make the flower tighter.
Now is the time to assemble the flower. You could use fabric glue or a needle and thread to attach the pieces together.
After I got to this point, I thought it was pretty, but not amazing, so I took some white craft paint and a tiny brush, and painted the tips of the petals. It only took an extra ten minutes.
Here's the difference.
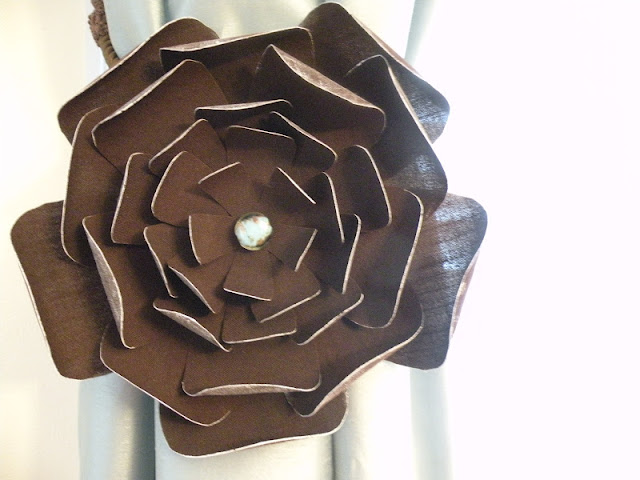
I had some beads in my stash that matched the room, so I used some GOOP glue to attach them to the center. Then I made a sling on the back with some ribbon and hot glue and strung the tie-back cord through it.
Voila!
*contended sigh* That's better.


Impressed! Good job!!!! It really gave a tie-back a modern, fun twist:)
ReplyDelete