I find, however, that it is often cheaper to buy curtains readymade than to make them myself, not to mention time saving! As a mom of little bitties, this is important.
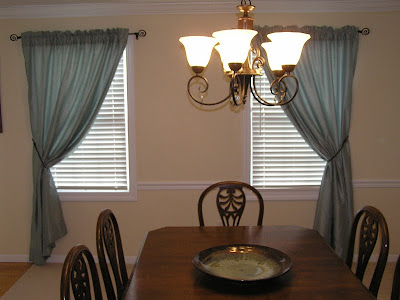
So here's my problem with storebought curtains. They often look storebought, and they are usually very boring. Case in point - my dining room curtains.
The sun sets right through these windows, so having thermal, light blocking curtains was a must or dinner in the summer got really hot and glaring. Buying these was significantly cheaper than making them, thanks to a coupon on top of a sale, but though they matched colorwise, they were BORING. Kind of wah wah {that's my boring sound effect, which would be effective if you could hear it, seeing as it's a sound effect}. Anyway, I intended to improve upon them and make them look more custom, and, only a year later, I'm doing it. How's that for being on top of things?
First, I asked Handsome Hero to raise the curtain rods, which makes the ceilings look higher and therefore the room look bigger. Okay, so they weren't raised much because of the crown moulding, but in person, I promise it's a bigger change!
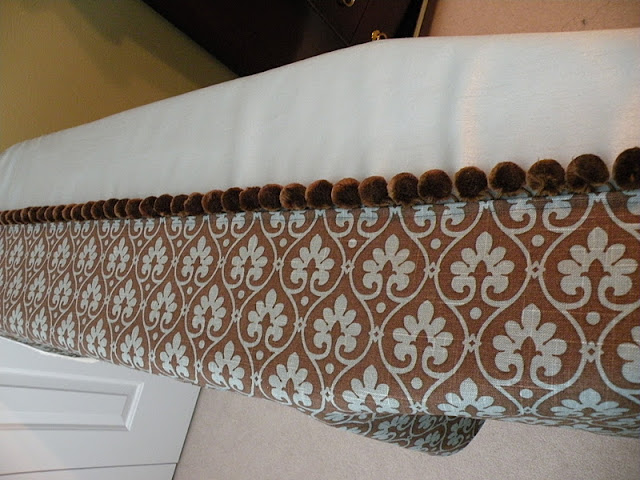
When I was scouring the clearance remnant section of Hancocks a few months ago, I saw this gorgeous fabric. Happily, the blue is an exact match to the dining room curtains.
To customize them, I sewed a panel of the new fabric to the bottom of the old curtains, but it puckered and didn't look right at all, so I had to take it out and start again. This time I sewed the top and bottom of the panels by themselves first and then attached them to the curtain. How did I do it?
FABRIC FUSION!
I got this months ago when I was working on the book sling in the living room.
My sewing machine wasn't working properly {or maybe it was the operator? Nah, couldn't be.} and I was too impatient to wait, so I polled the ladies at Hancocks fabrics, and across the board, they loved this product. One lady said she uses it more than her sewing machine.
My sewing machine wasn't working properly {or maybe it was the operator? Nah, couldn't be.} and I was too impatient to wait, so I polled the ladies at Hancocks fabrics, and across the board, they loved this product. One lady said she uses it more than her sewing machine.
I was sold. It did work well, and the book sling shows no sign of wear after a year of daily use. You could use the fabric glue for this entire project, but you'll have to wait for each glued section to dry, so while it's easy, it will take a long time. I am not that patient, plus the seams I did sew make it look as though I sewed the entire thing.
Make a line on your curtains where you want your ribbon, fabric, or trim to go. I wanted my patterned panel to cover about the bottom fourth of the curtain, so I made my line accordingly. Clearly, I didn't use the correct measuring tool or a fabric pen, but it worked just fine since it was going to be hidden.
I applied a thin bead of fabric glue across the dotted line.
Do my hands look old?
After the trim was dry {2-4 hours}, I put another bead of glue on the top and placed my fabric where I want it to go.
After letting this dry overnight to be safe {since it was two layers}, I folded the side edges over twice and sewed them, though I could have used the fabric glue again.
Then just hang them back up and, voila!

My mother is horrified right now about how long these curtains are, but I like them.
I like fabric glue because you don't have to own a sewing machine to make curtains or improve on something you already have. Also, it is {supposed to be} machine washable and dry cleanable, but I haven't tested that.


This comment has been removed by the author.
ReplyDeleteGreat job, Beth! We are curtain warriors!
ReplyDeleteVery interesting information!Perfect just what I was searching for!I like this site very much, Its a really nice position to read and find information.
DeleteCurtains