Labels

Thursday, June 14, 2012

Embroidery hoop redo

When we first moved in to this house, I wanted Ella's room to scream GIRLY, but without painting the walls.   A couple of the ways we tried to do that were to make a bunting type/moulding-esque border around the ceiling from ribbon and scrapbook paper, and to get some embroidery hoops and put cute, girly fabrics in them to make a bubble wall of sorts.
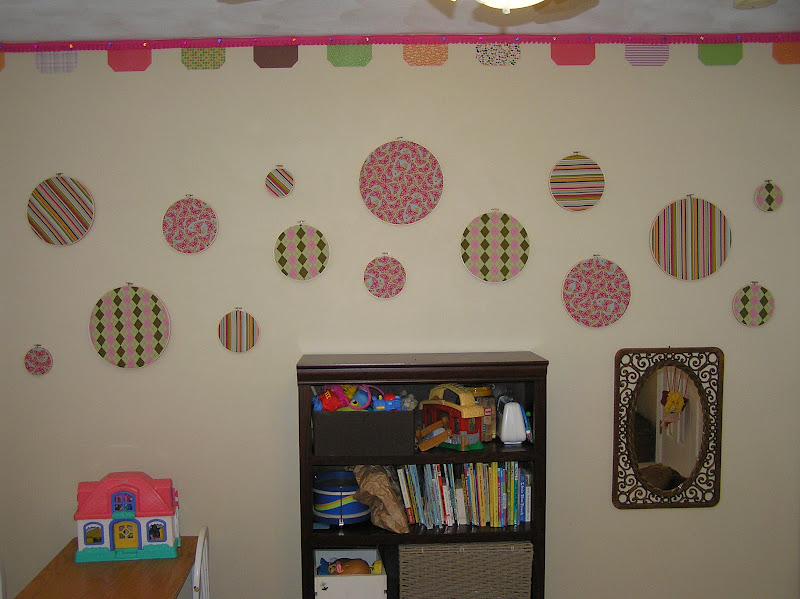

To tell the truth, I never loved it.  The border was great, and I loved the idea of the hoops, but they always left me a little wah-wah.  Looking back at the picture above, I think they blended in with the wall color too much.

Enter:  these guys.


When Elizabeth was here,  we took down the border.  It actually went with the room colorwise, but was too girly for a space shared with a boy.

Then Elizabeth volunteered to take over the project of transforming this wall.  She put new fabric in the hoops {on top of the old - no reason to make it harder than it needed to be} and cut out numbers in felt.  Then she glued them onto the fabric with fabric glue.

Lest you think I can't count, the #3 is in the blue hoop next to the #2. It's more obvious in person.
I love it. 

I don't just love it. 

I LURVE it. 

It's about perfect, in my mind.  The kids dig the numbers and I love, uh, lurve,  that they are all a bit different, but coordinating.  Much better.  Interesting how a relatively small change can make such an impact.

I also love that I didn't have to do it, because I REALLY stink at cutting felt and was dreading doing this project.  Elizabeth, dear unsuspecting soul, was positively excited at the prospect, and you can picture me, slightly giddy and with a full Cheshire Cat smile, saying, "Sure!  If you want to do the cutting....I mean, I don't mind or anything...."

Wednesday, June 13, 2012

Curtains? What faux?

When we first moved into this house, my mom made these curtains for the living room.  I love them.  They're subtle but with a graphic design. 


Originally, I had thought I would want roman shades for all the windows and bought material accordingly, but when we had lived in the space a bit, I decided the windows needed more presence to balance the orange wall.  Hence the heavy drapes.


I didn't put anything on the orange wall at first, thinking it would be overpowering.  The longer we have lived here, though, those windows have seemed to need something.  The other window is so heavily draped that these feel naked. 

I had enough material left over to make some valances, but I don't really like most valances.  Faux roman shades were much more appealing, but I didn't know how to attach them to the blinds, which were staying.  I sat on this, stumped, for about a year until I recently saw something brilliant.  Genius, I tell you.


Ta Daaah!  I am so pleased with the result!!  They sit inside the windowframes, which is what I wanted.  I am so happy with how these turned out.


What's that?  You want to know the slap-your-forehead-because-you-didn't-think-of-it-first explanation?  Check it out, friends.


That's right!  Velcro!  I'd been thinking through all sorts of convoluted fixes when it was essentially a duct tape-type of solution.  I thank whoever came up with this from the bottom of my faux-roman-shade lovin' heart. 


It couldn't been easier and I'm so glad to have it done! 

I didn't do a tutorial on how to make these because I don't think I could replicate it if I tried and I'm sure there are much better ways to make them.  I didn't follow any sort of directions myself, but I'm sure there are myriads of sites out there showing how to make faux roman shades.  I can give you the last step, though. 

Ready?

Once you have made your shade, slap up the velcro and stick 'er on! 

That was the technical version.